DRIVER APPLICATION
Each driver will be given 1 account to log in to the driver application.
Account information and application settings will be provided by the administrator.
1. Installation
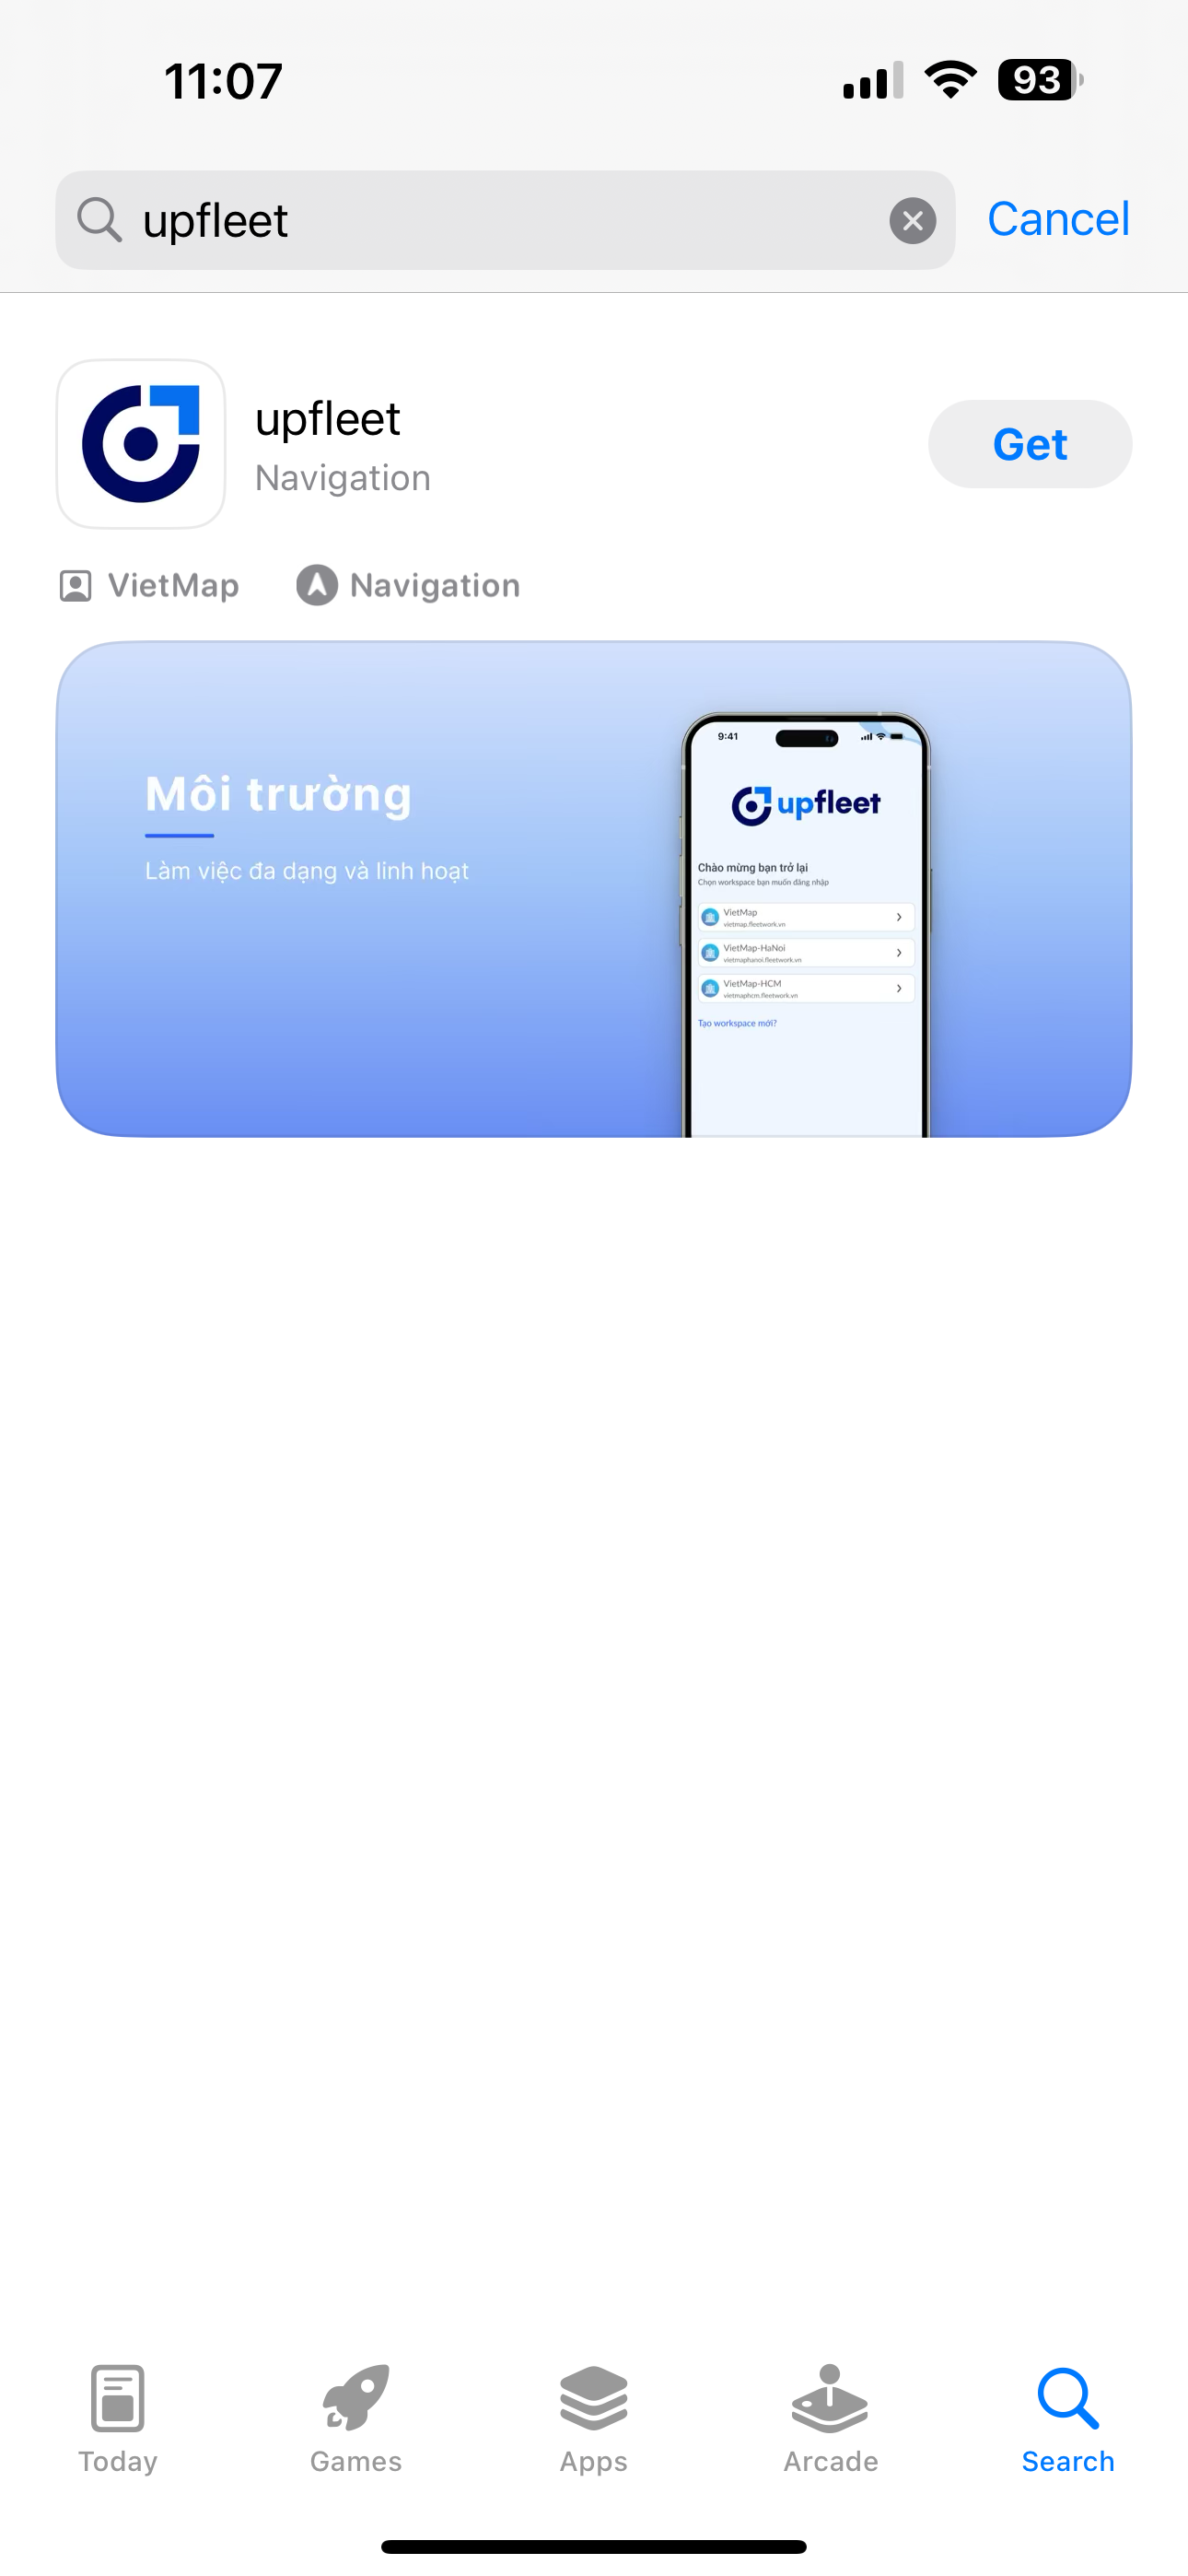
- iOS
- For iOS, users go to "App store", search for the keyword "Upfleet", then download to the device.
- Android
- For Android, users go to "Google Play", search for the keyword "Upfleet", then download to the device.

2. Login
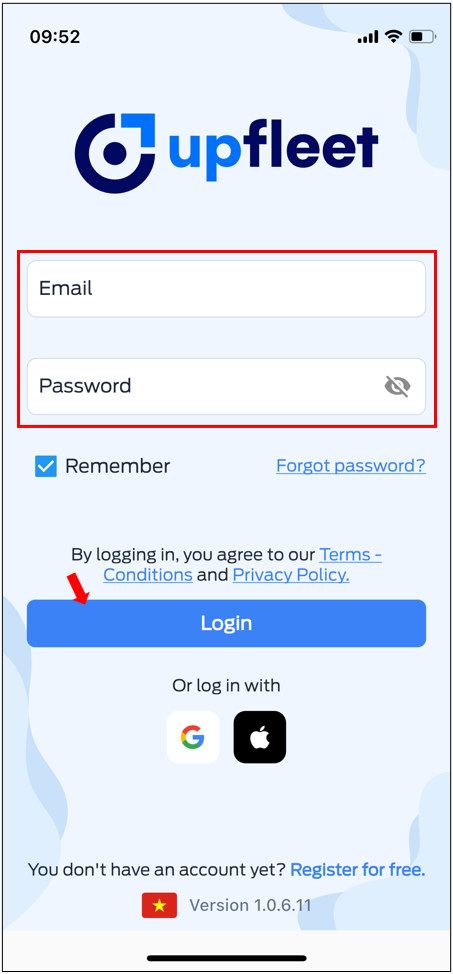
2.1 - Login using Username and Password
On the Login page, users enter their registered Username and Password in the system, then click the "Login" button.
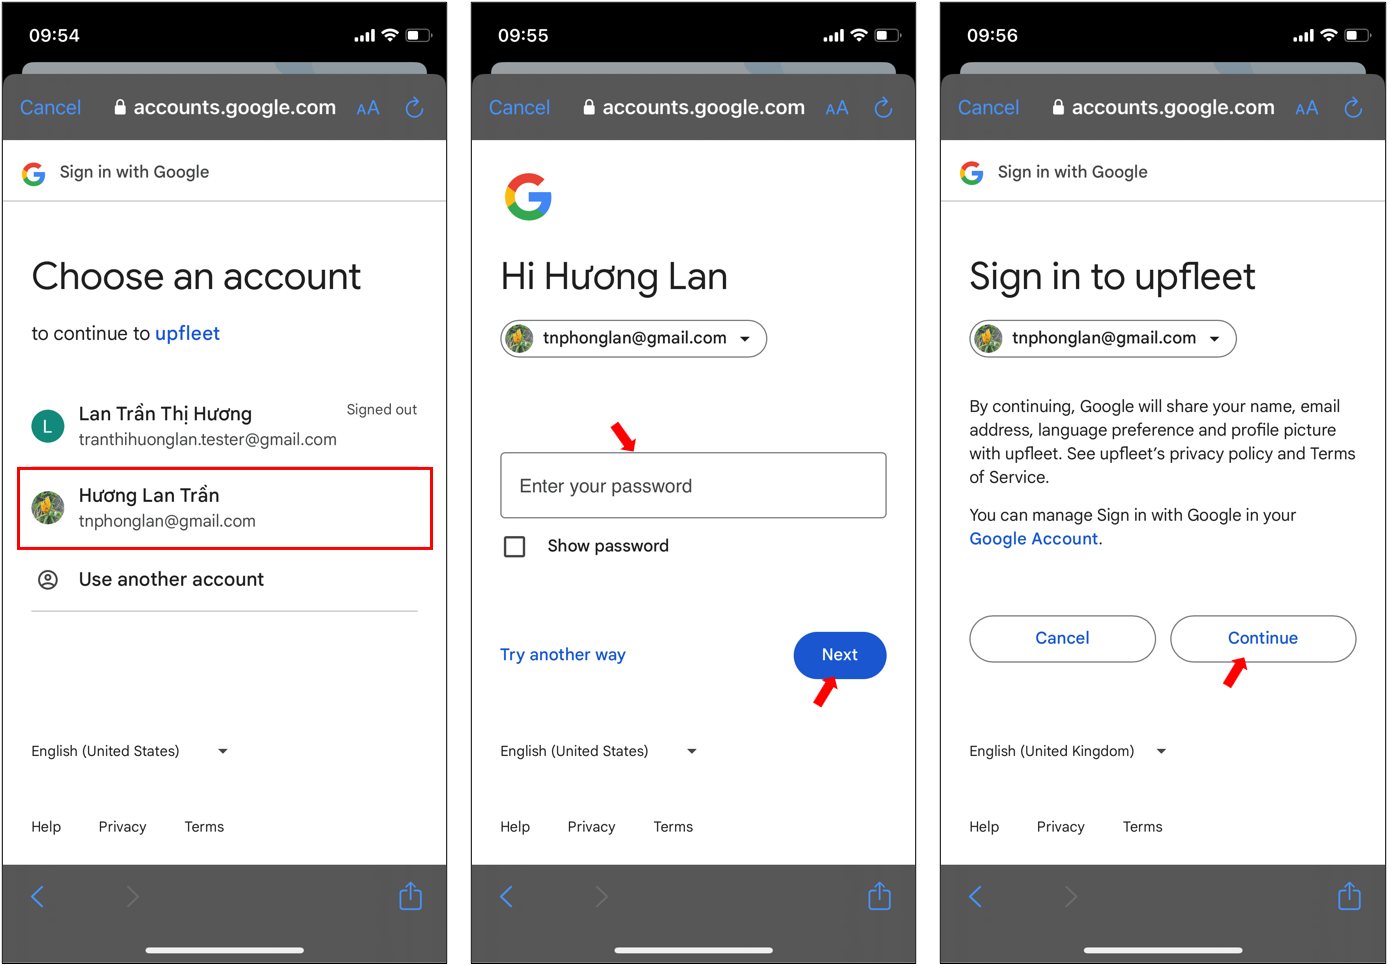
2.2 - Login using Google
Tại trang Đăng nhập, the user clicks on the Google icon and selects "Continue."
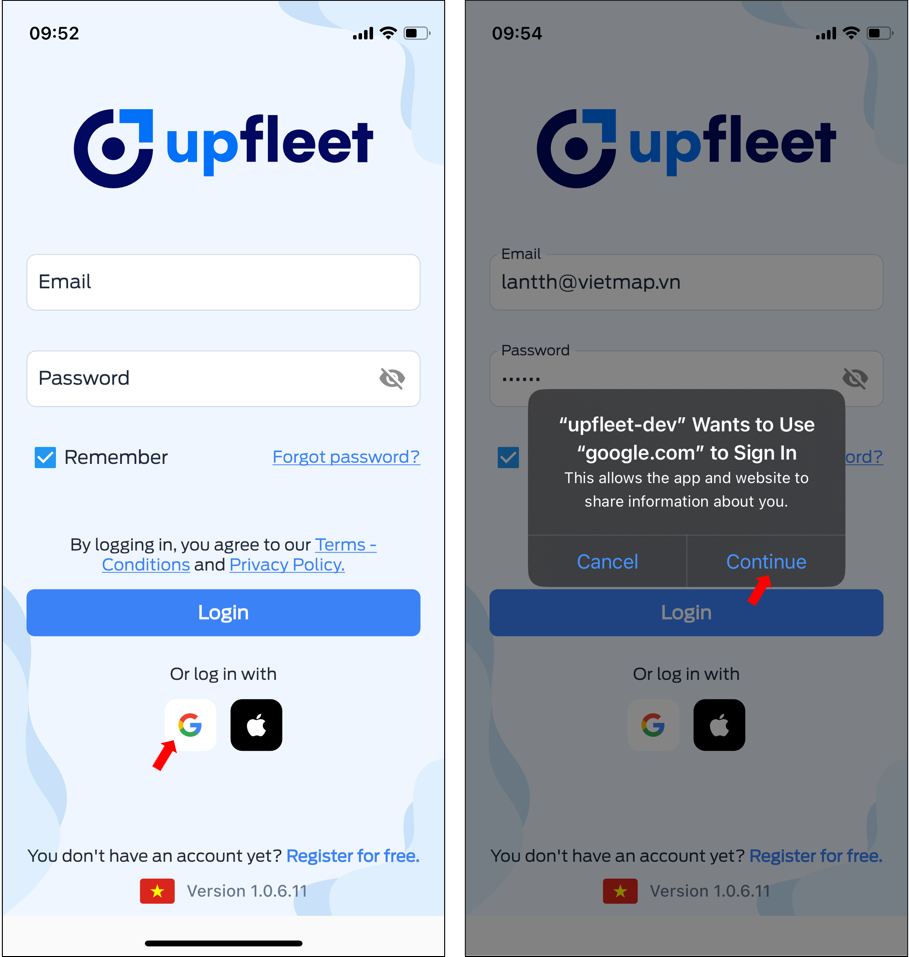
Select your account, enter your password and click "Next." Then, follow the Google login verification instructions and click "Continue."
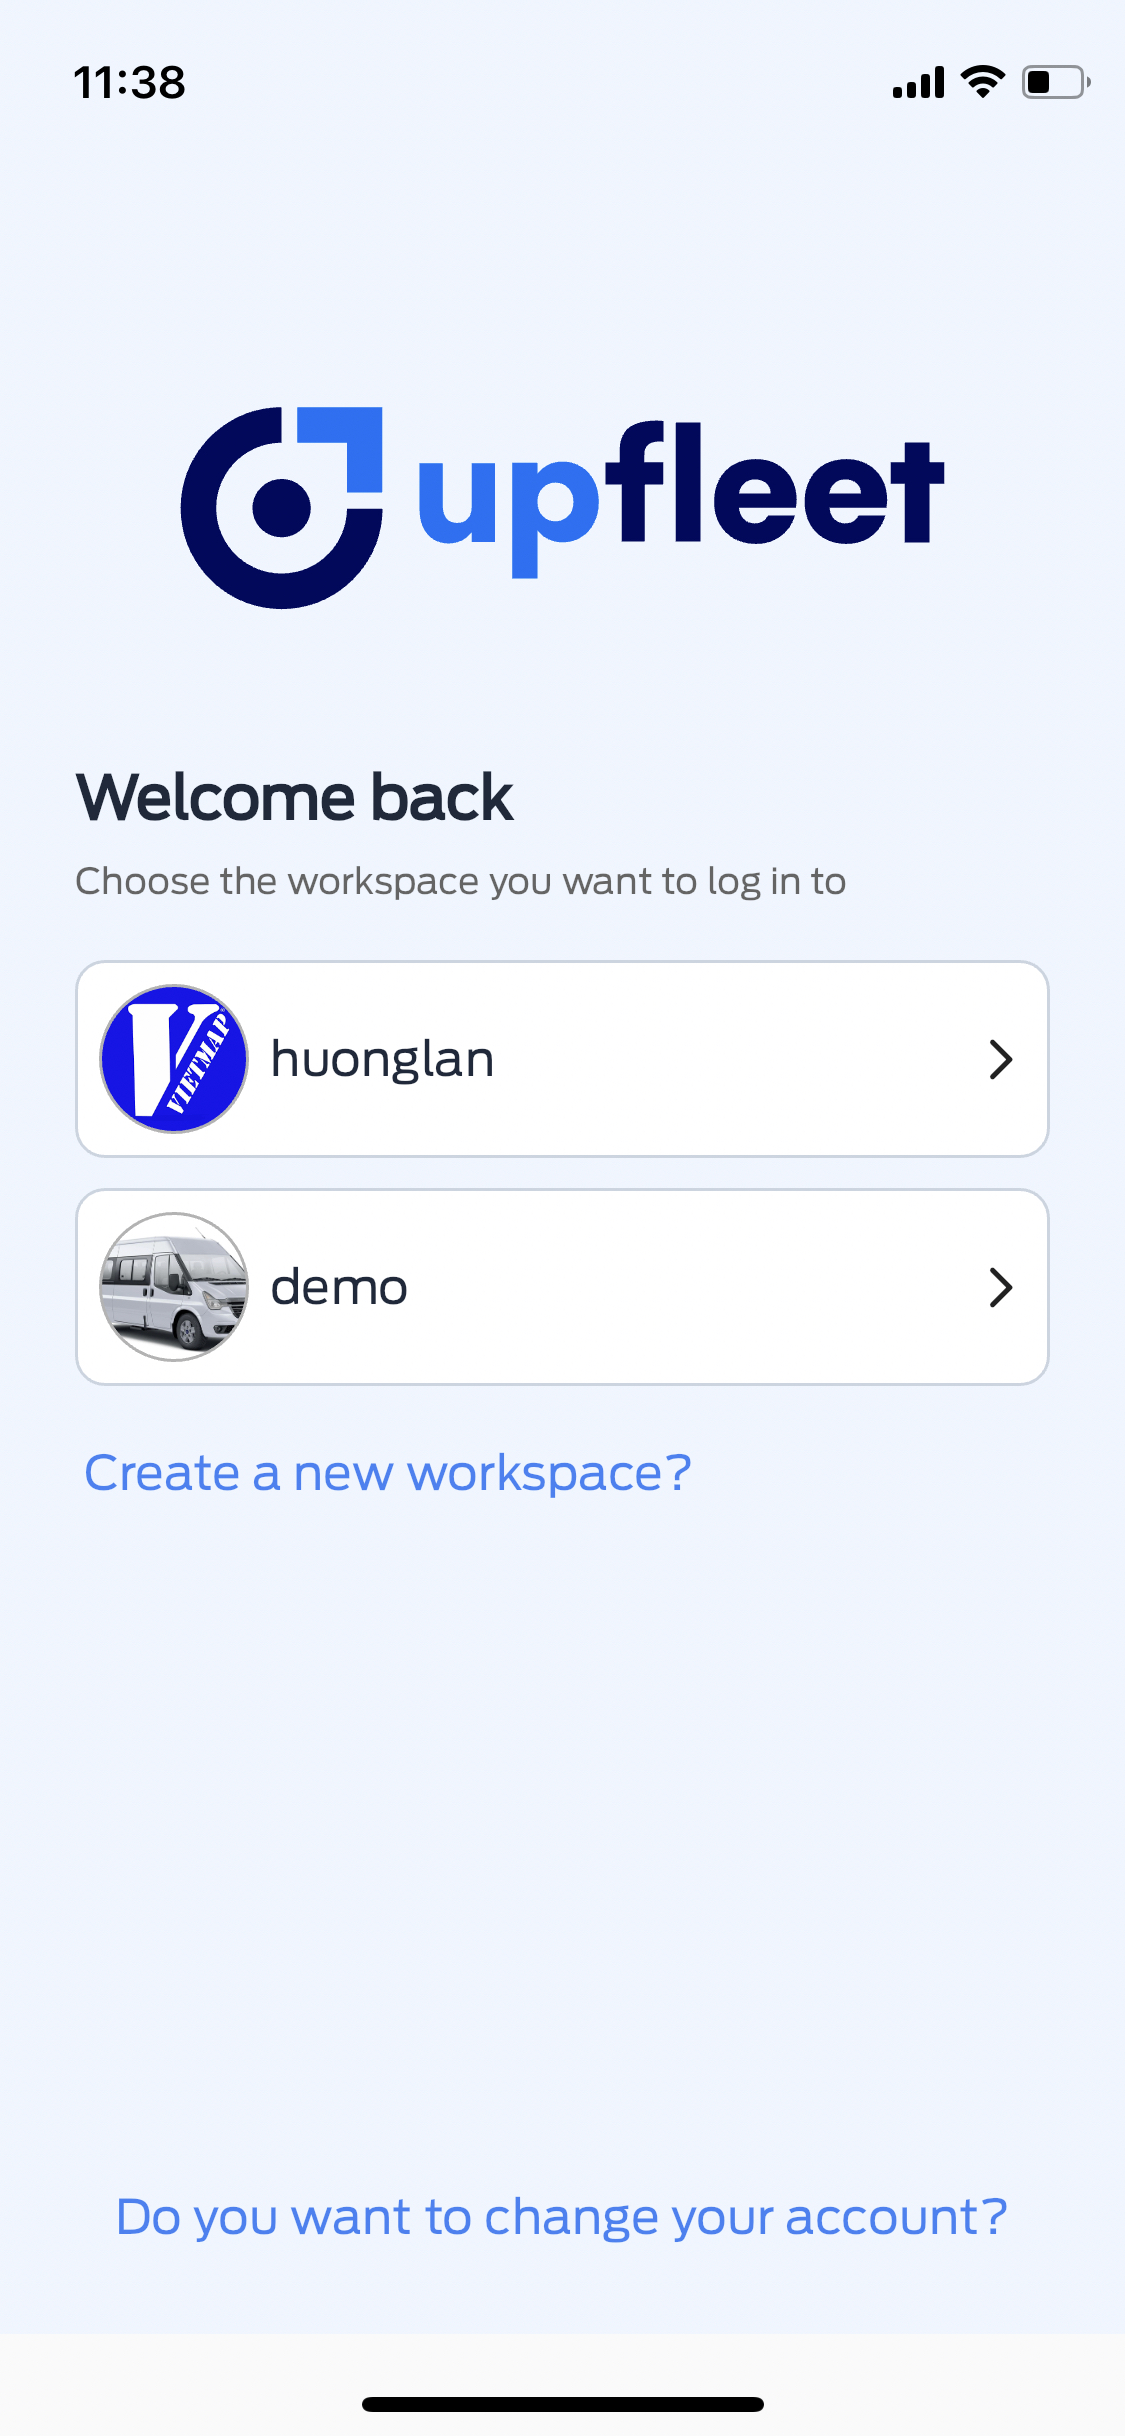
 On the Workspace List page, select the Workspace you want to work in.
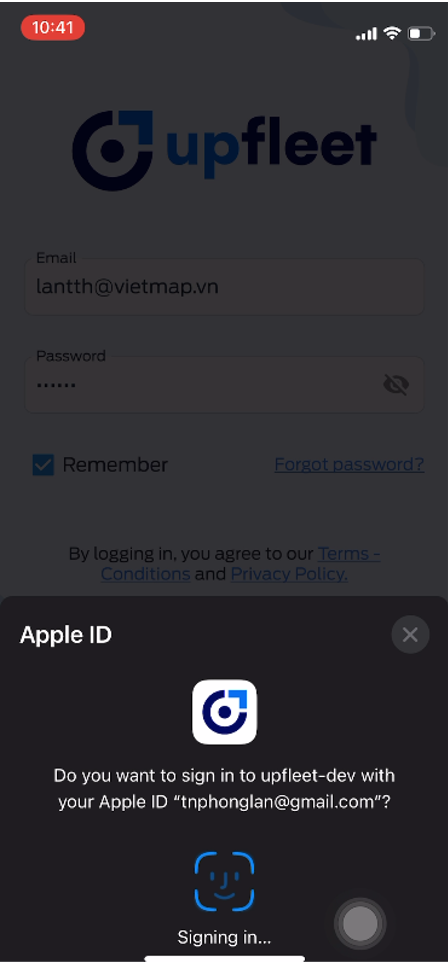
2.3 - Login using Apple
Applies only to iOS operating system. Condition: Your Apple account has successfully logged in on the web.
On the Login page, click on the Apple icon and select "Continue."
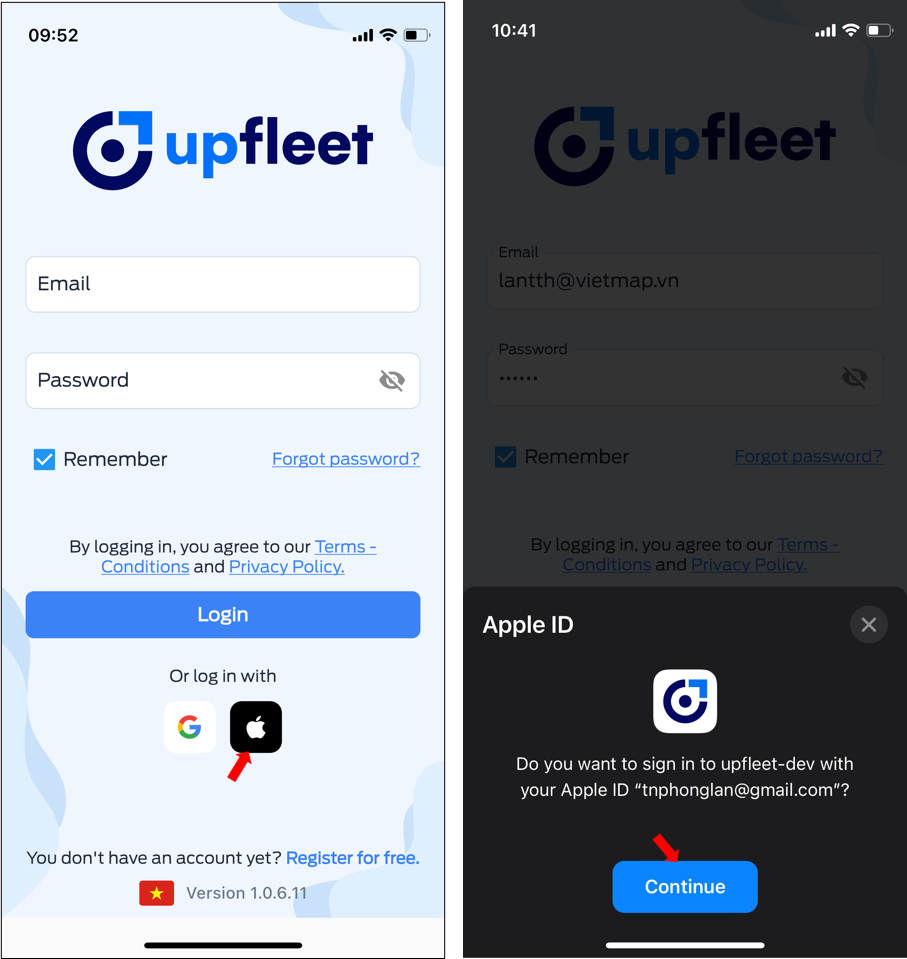
Log in to your Apple account following the provided instructions.
On the Workspace List page, select the Workspace you want to work in.
3. Workspace
After logging in, the driver will select a workspace to work in.
Like the management system, Workspace is defined as a workspace for a company or organization in the Upfleet system. Each Workspace in the driver application will have full features such as: vehicle list, trip list, rental car list that the user chooses to work with,...
4. Vehicle
The user needs to select a vehicle to work with. After selecting a vehicle, the application interface will display a list of trips or a list of rental requests for that vehicle.

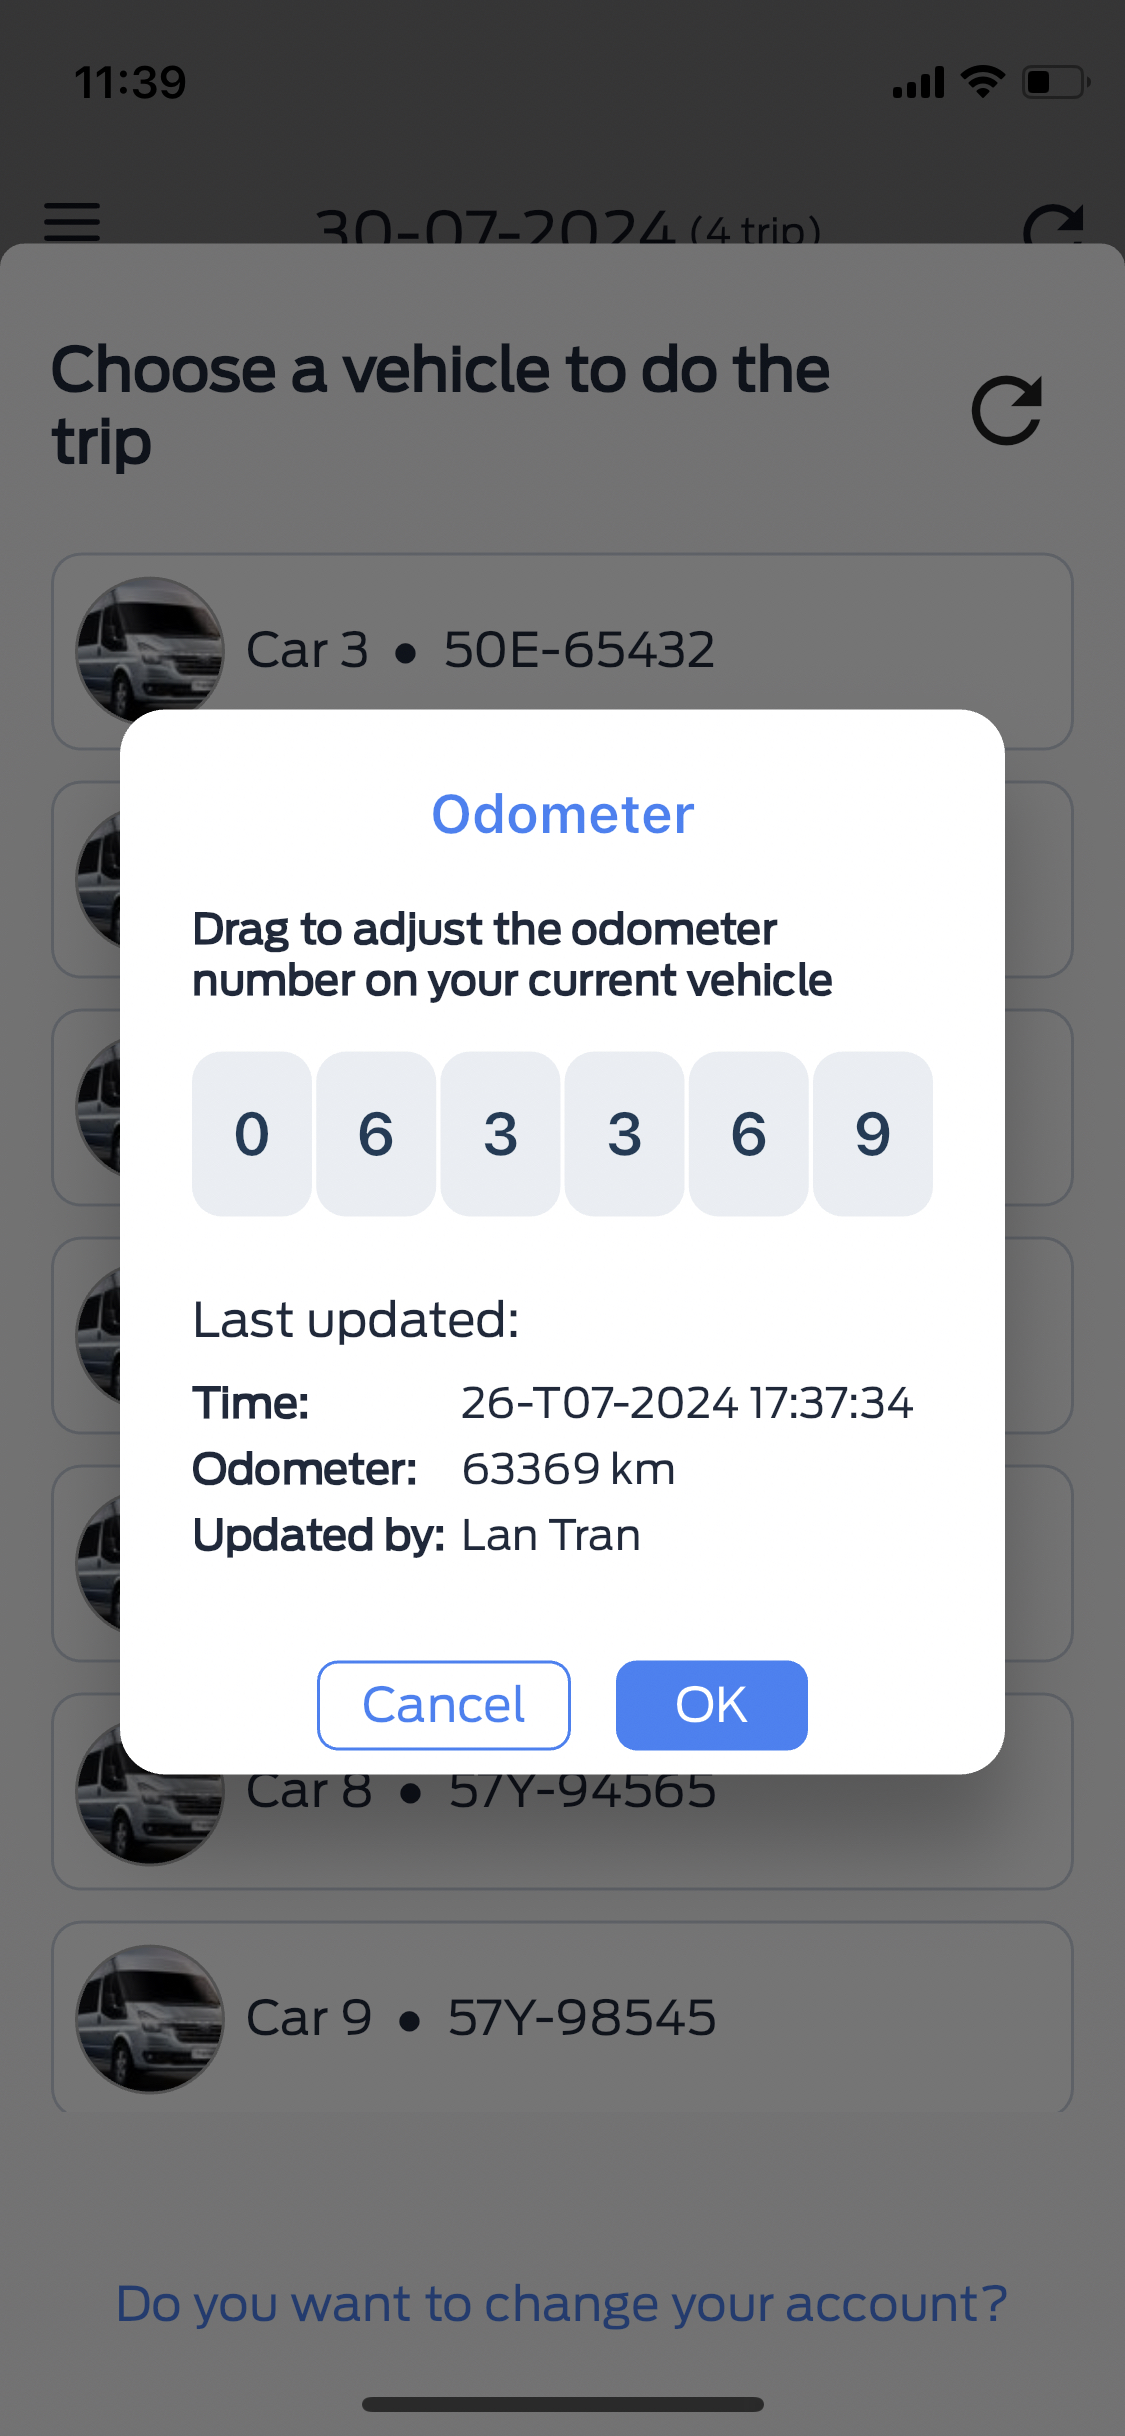
5. Enter Odometer
Driver enters current Odometer information on the vehicle to start the working day
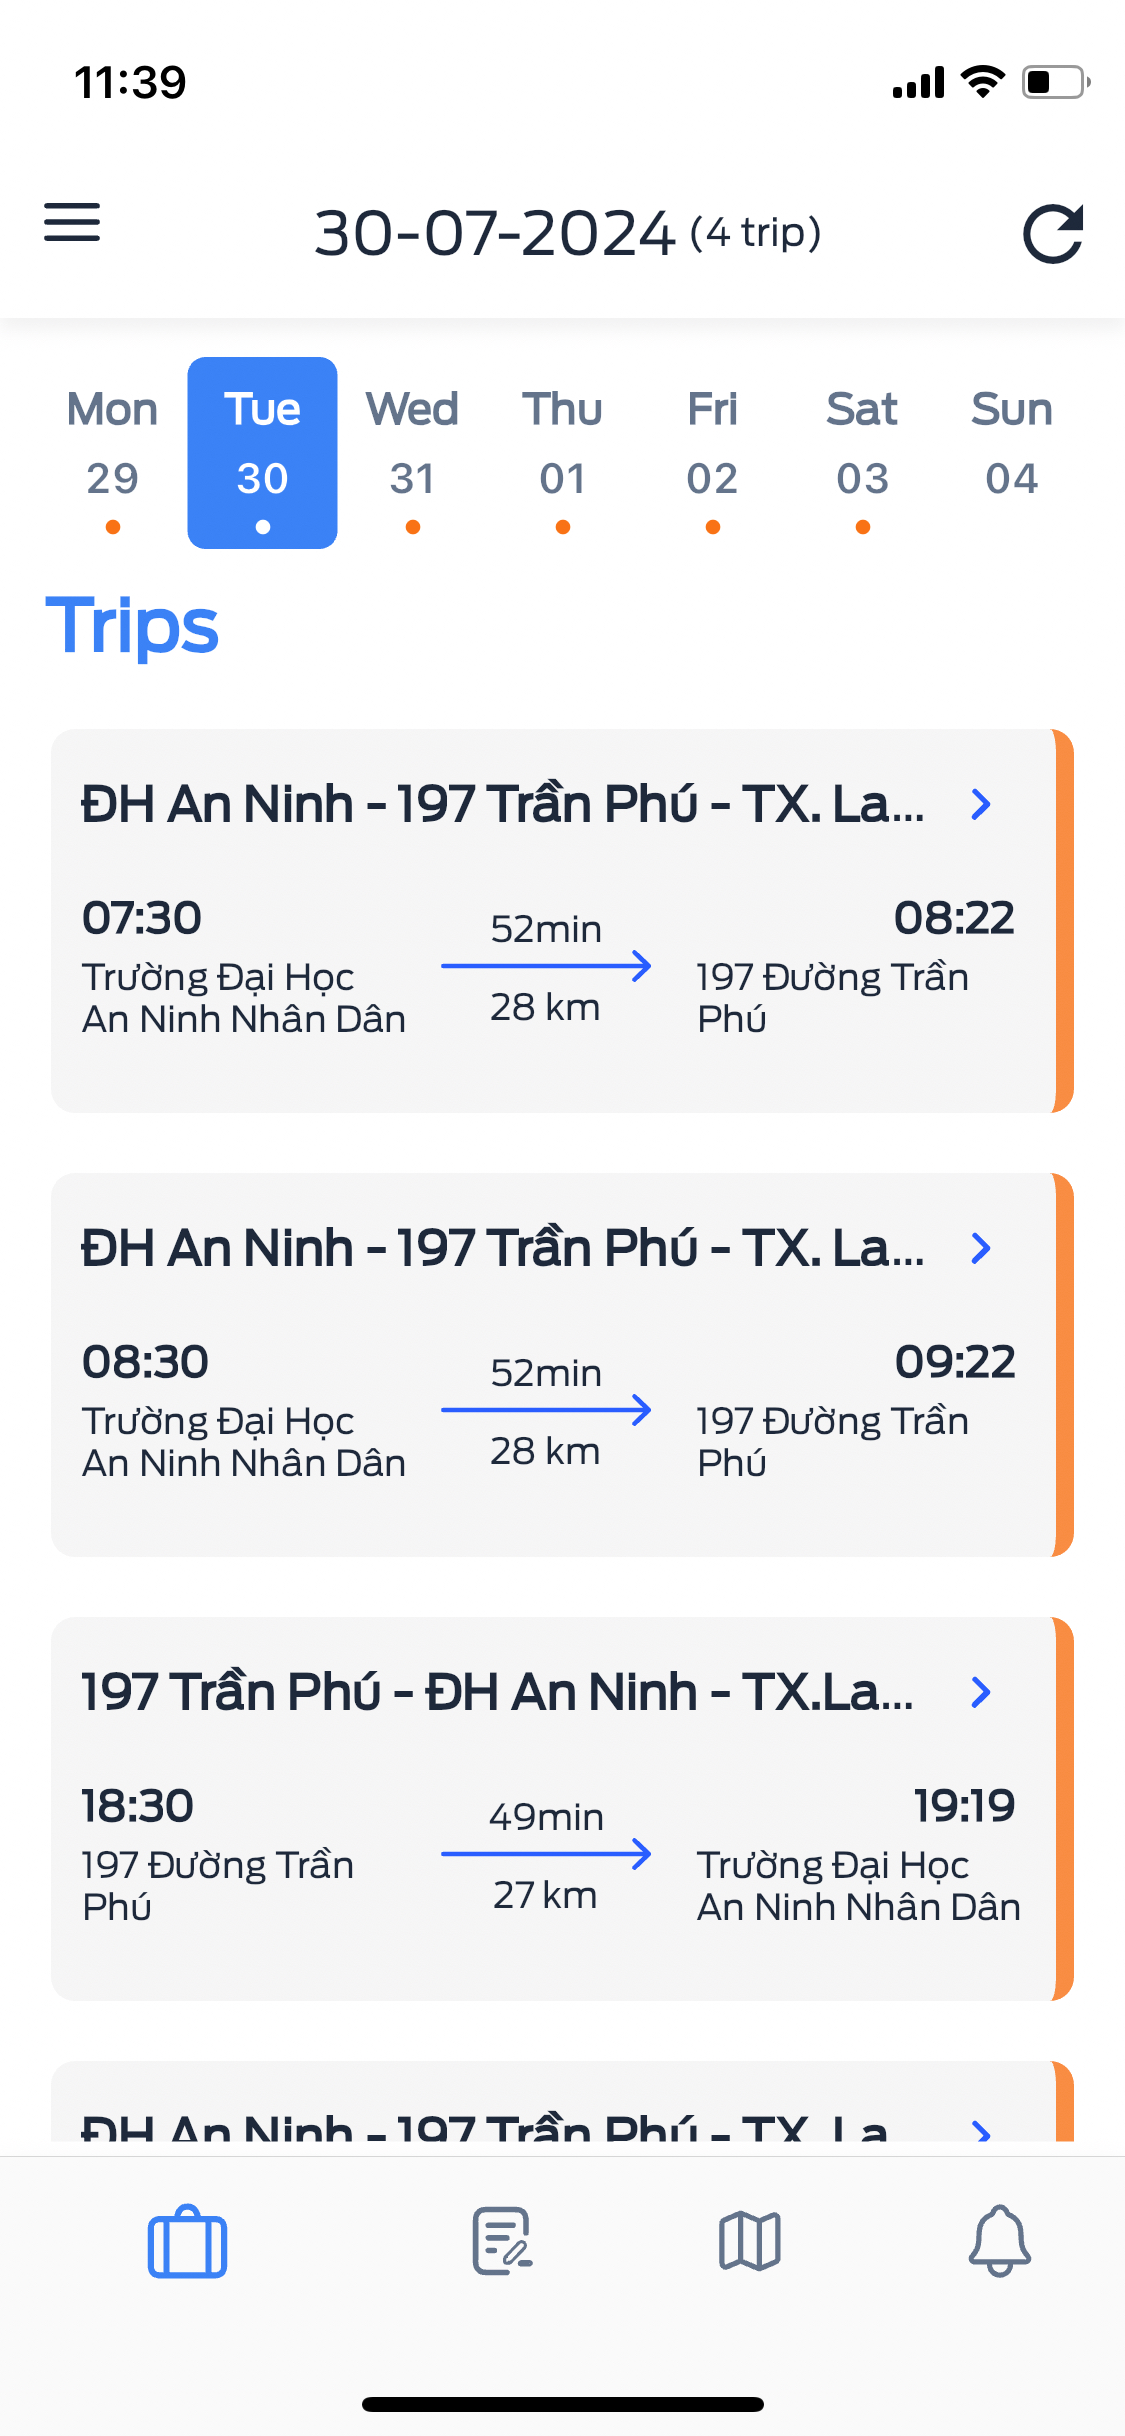
6. Trip List
A place to display the entire list of trips of the vehicle that the driver is choosing by day (default by current day). On the interface of each trip, there will be information such as trip name, route information (departure point, destination, stations, time, distance), vehicle information.
7. Trip itinerary overview
When clicking on a specific trip in the trip list, the system will switch to the detailed information page of that trip, where the driver will see the trip information:
-
Total distance, total time of the trip.
-
Estimated time to get to the points and stations in the trip, besides, the driver can also see the passengers getting on/off at the points and stations.
-
The driver can also see the detailed information of the passengers.
To make a trip, the driver needs to swipe right on the "Swipe to start trip" button to make the selected trip

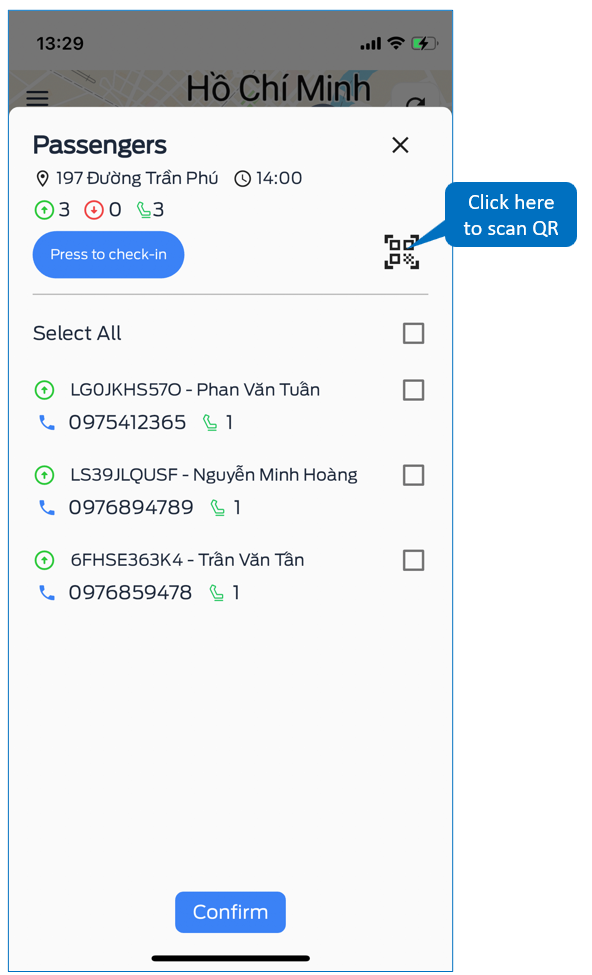
8. Scan the QR code for passengers to get on the bus
During the trip, when arriving at the driver stations, it is necessary to confirm the passengers getting on/off by scanning the QR code.
- If the passenger has registered for the trip: after scanning the QR code, the passenger is added directly to the trip
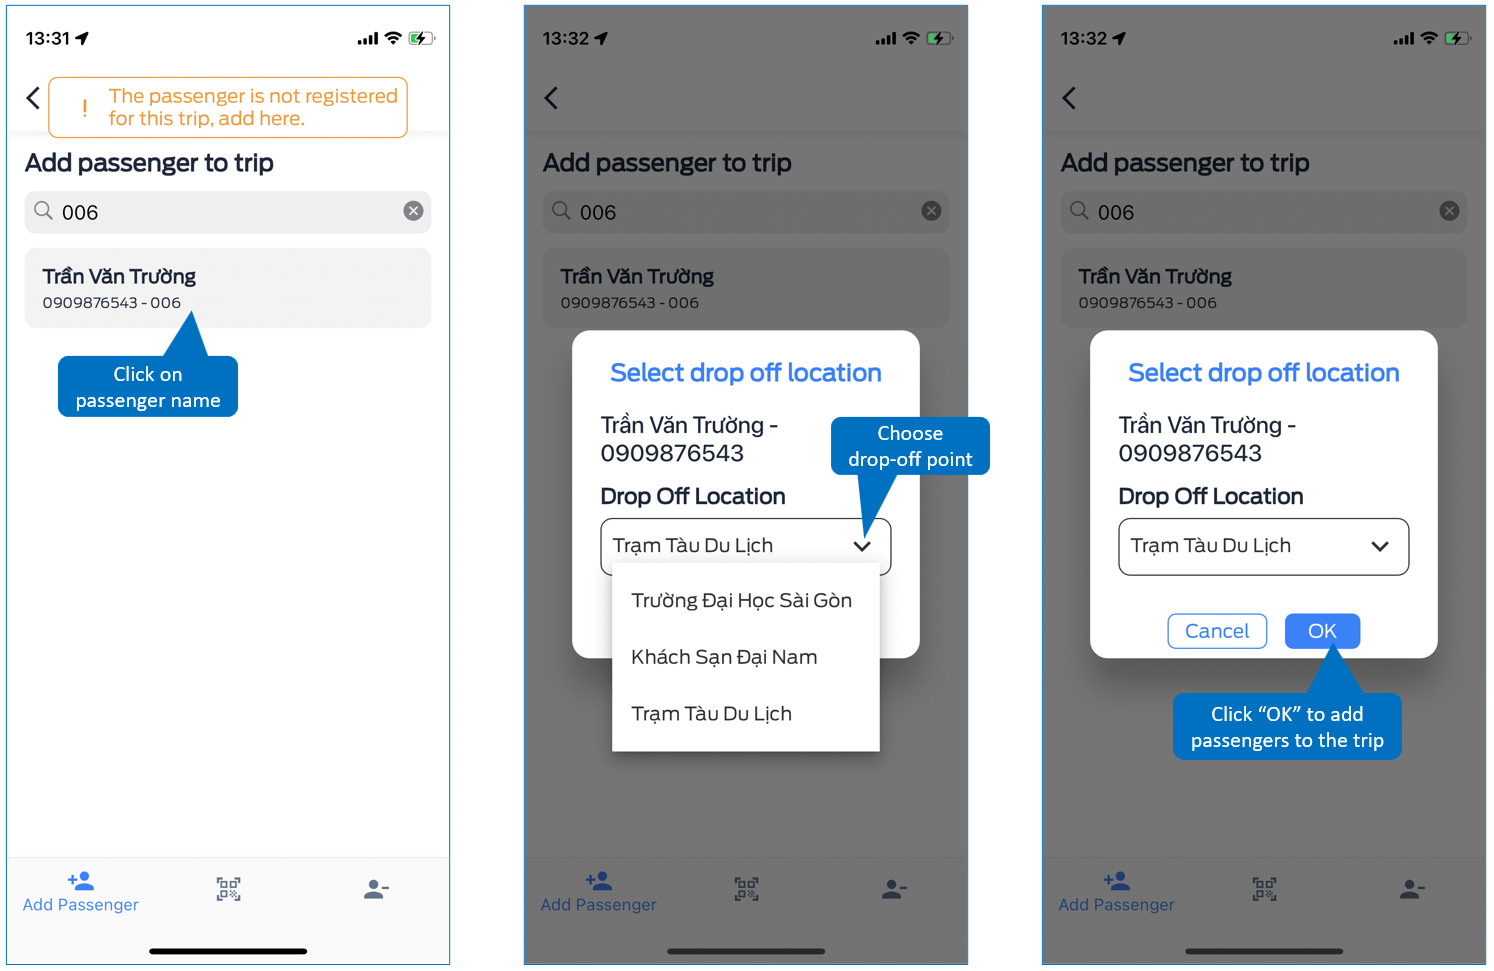
- If the passenger has not registered: after scanning the QR code, the application will display a notification that the driver needs to select the passenger's drop-off point and then add it to the trip.
9. Vehicle rental list
A place to display the entire list of vehicle rental requests that the driver is selecting by day (default by current day).
On the interface of each trip, there will be information such as trip name, route information (departure point, destination, stations, time, distance), vehicle information.
- When someone sends a car rental request, the system sends a notification to the driver: the driver needs to go to the application to confirm whether or not to accept the rental request? If the driver agrees, the rental request is added to the list.
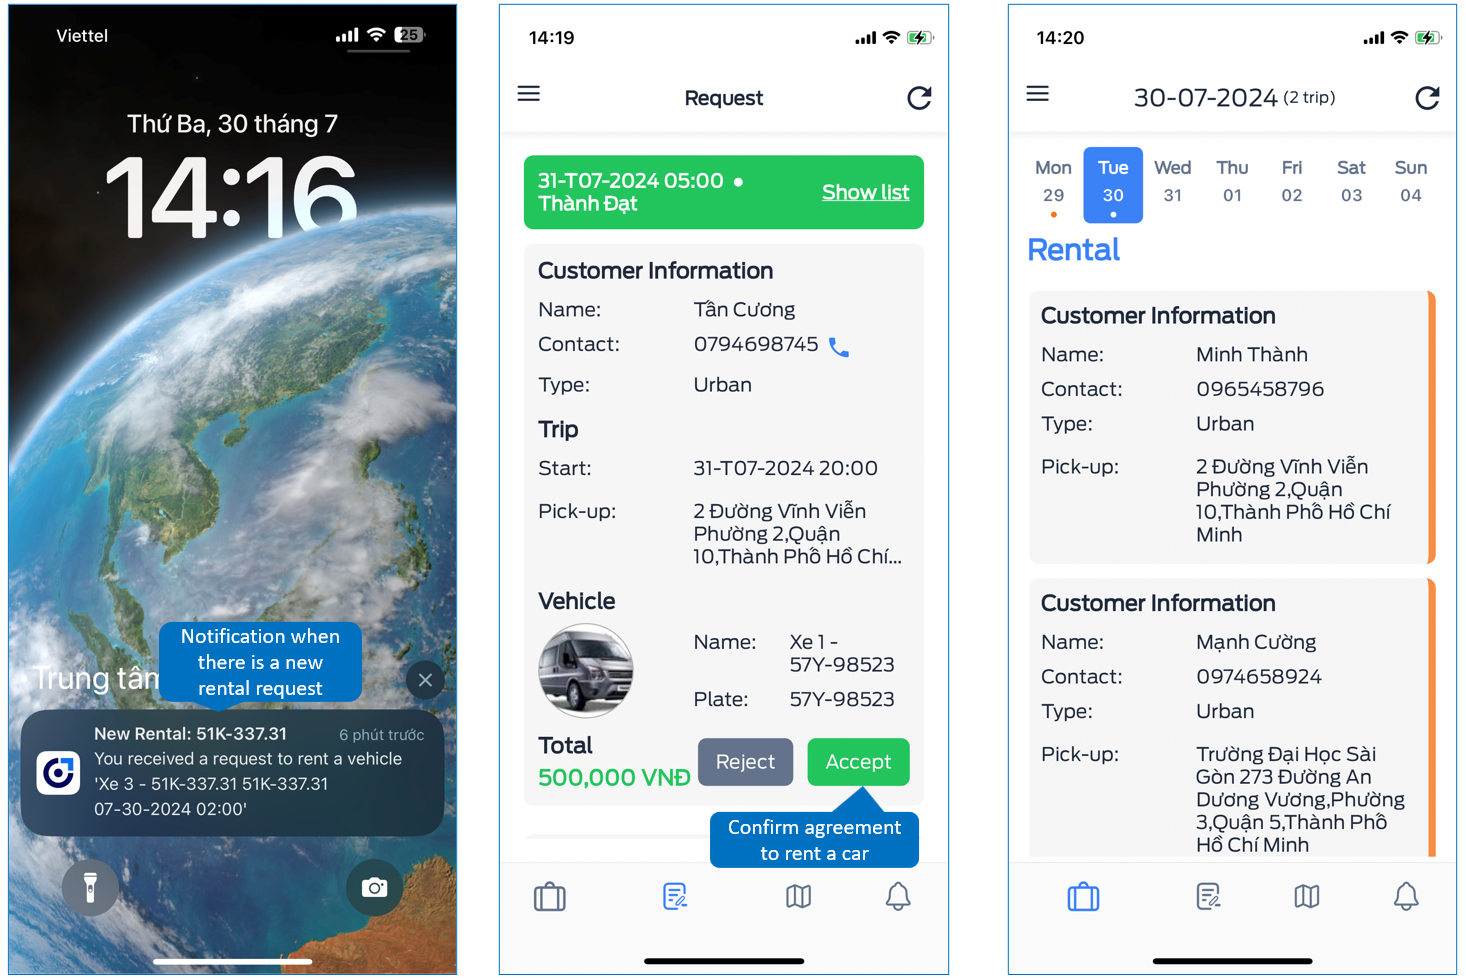
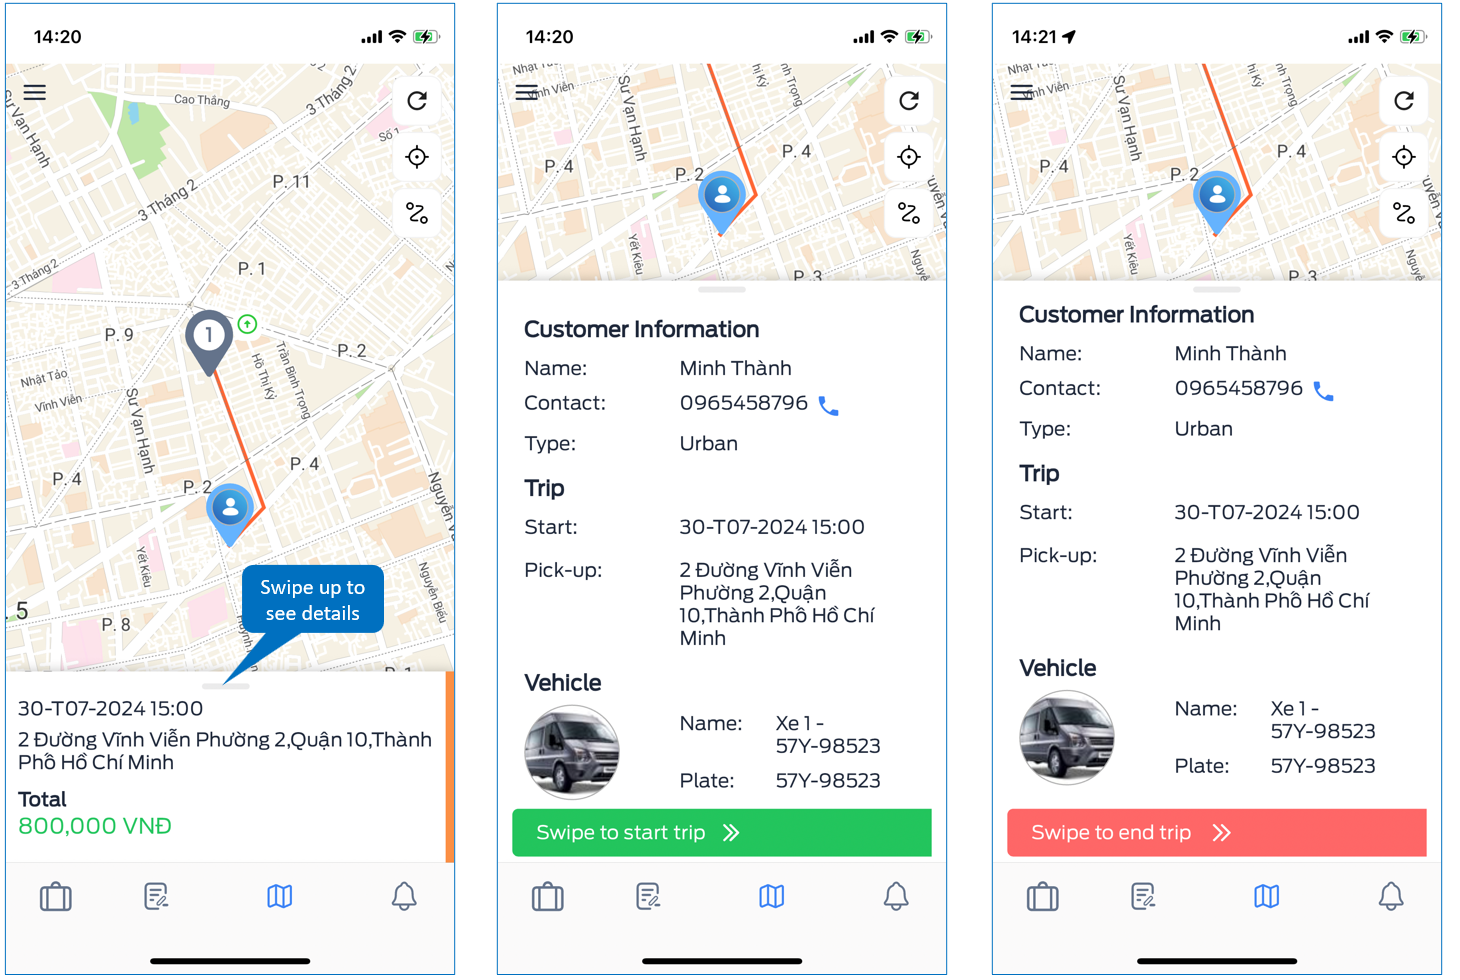
10. Overview of a car rental trip
When clicking on a specific trip in the rental list, the system will switch to the detailed information page of that trip, where the driver will see the information of the trip: Renter information, rental time, start time, pick-up location and estimated price for the rental trip.
To make a trip, the driver needs to swipe right on the "Swipe to start the trip" button to make the selected trip.
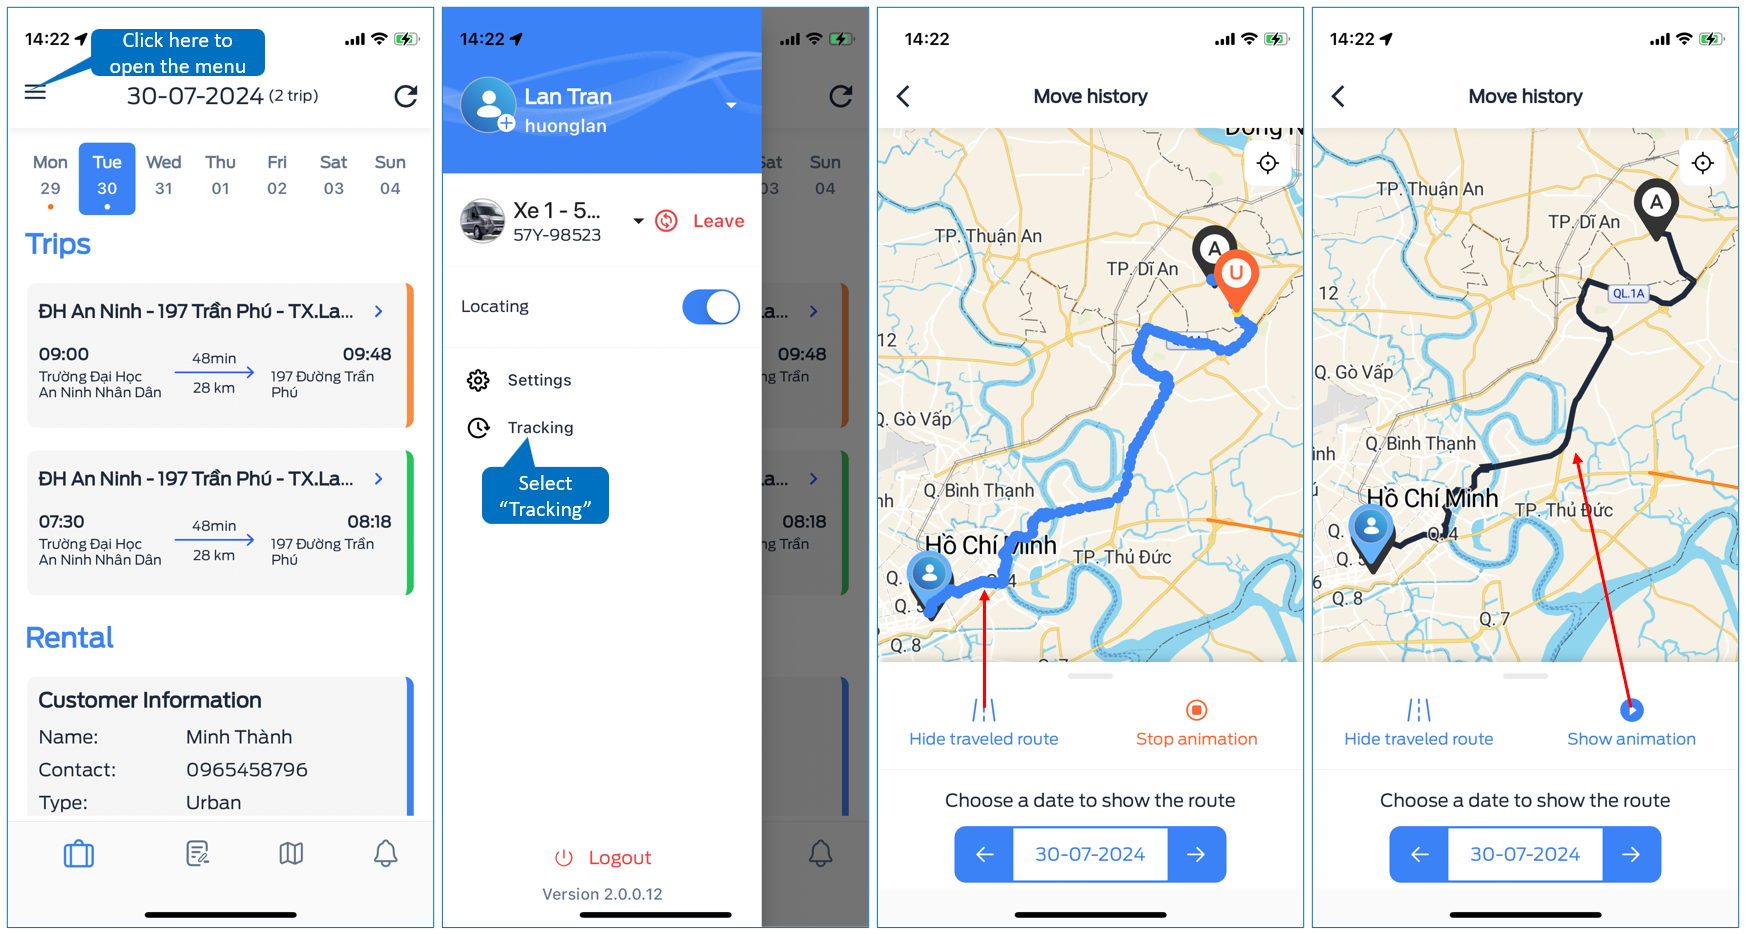
11. Track routes, travel history
To review the vehicle's travel history, users perform the following steps: